How to Add IPv6 Support to CloudFront and S3 Websites
If you host your website on Amazon CloudFront or directly on Amazon S3, you may not currently have it configured to support IPv6. This means that visitors won’t be able to access your content with IPv6-only enabled which is not good. On top of that, I think its important to support IPv6 in order to future-proof your site and be a part of the effort to replace IPv4.
Enabling IPv6 Support on Amazon CloudFront
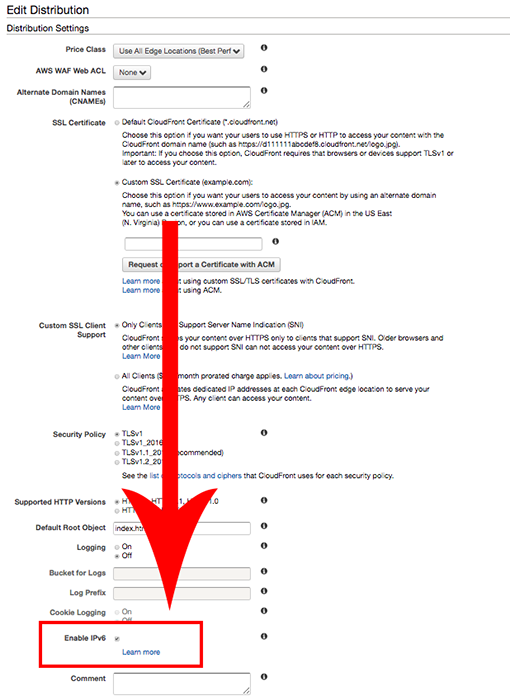
Step 1: Make sure your CloudFront distribution has IPv6 Enabled
To enable IPv6 in CloudFront, go to the Distribution settings and check the “Enable IPv6” checkbox down at the bottom of the page.
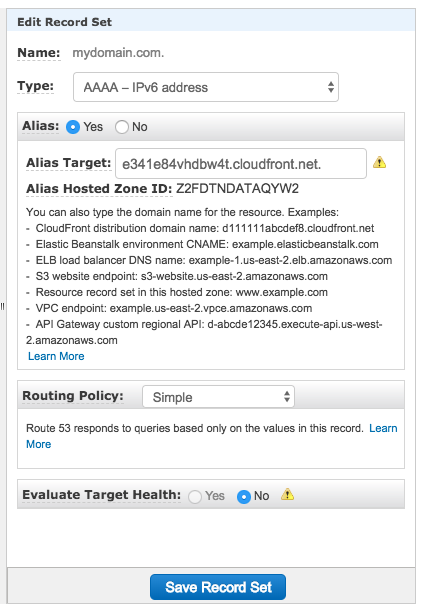
Step 2: Create a AAAA alias record pointing to your CloudFront distribution.
This is very easy if you are already using Route 53 for DNS. Simply select your hosted zone in Route 53, click “Create Record Set”, choose “AAAA” from the dropdown, set Alias to “Yes” and put your CloudFront domain name as your alias target ( for example “d111111abcdf.cloudfront.net” ).
That’s it! Your CloudFront website will now have IPv6 support. For more details you can check out the official AWS documentation.
Enabling IPv6 Support on Amazon S3
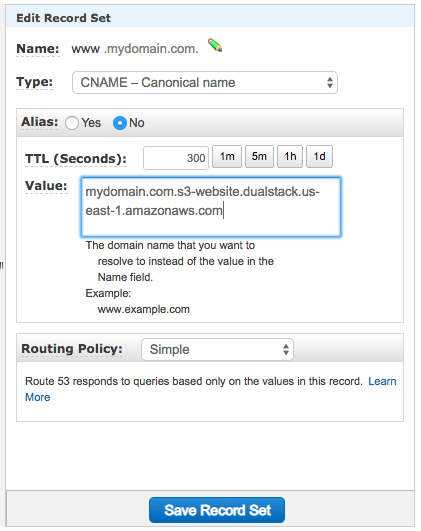
If you serve your website on Amazon S3 directly, the process is even easier. In Route 53, all you need to do is change your current CNAME value like this:
# old value
mydomain.com.s3-website-us-east-1.amazonaws.com

# new value
mydomain.com.s3-website.dualstack.us-east-1.amazonaws.com
Make sure that everything else stays the same except for s3-website-us which should be replaced with s3-website.dualstack.us.
Now your S3 website should support IPv6! For more information you can check out the official AWS documentation.