Building a 3D Printer Enclosure
Earlier this year, I purchased a 3D printer and it’s been a blast! I had no idea how easy it would be to create high-quality prints with such little effort. I’ve printed raspberry pi cases, kids’ toys, ceiling hooks, custom parts, electronics enclosures, curtain rod holders, phone mounts, bike parts, printer upgrades and I feel I’m just scratching the surface of what I can do with it.
The Enclosure
The more I printed, the more I realized how nice it would be to have an enclosure for my printer. My primary concern was noise reduction, but I also wanted to keep dust and other particles out. Additionally, I wanted to be able to print ABS and other filaments that require an enclosed, high-temperature environment.
By the way, I’ve put a list of both the purchased components and 3D printed parts that I used for my setup at the bottom of this post.
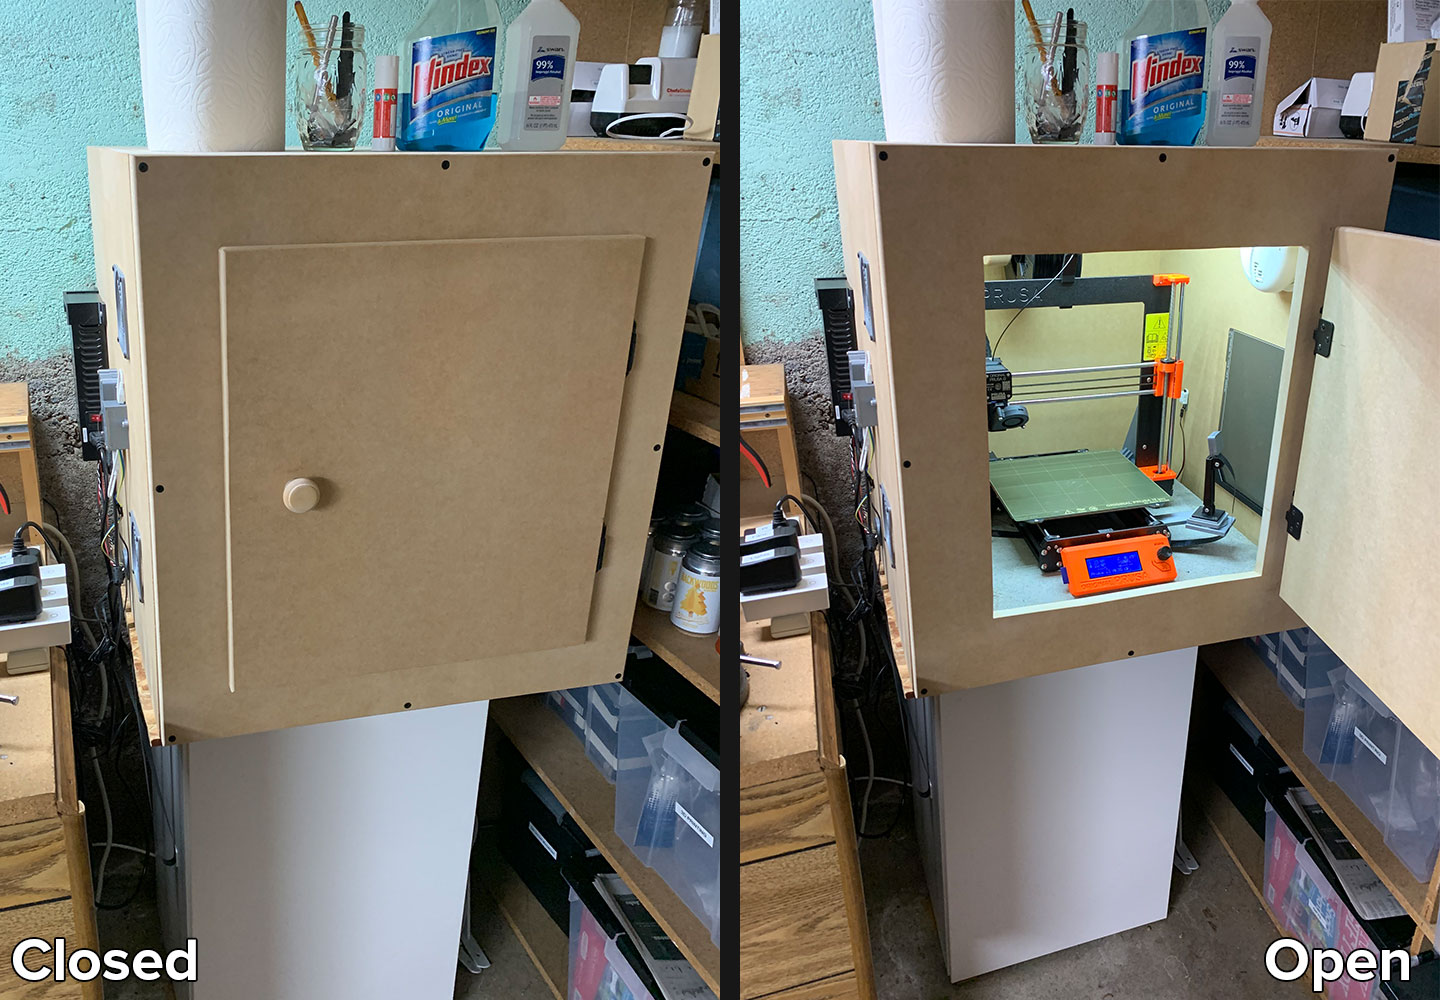
The enclosure build itself was quite simple, just a big box made of 3/4-inch MDF (roughly 22in x 22in x 24in interior dimensions) with a door for easy access. I thought it would be smart to make the front door panel completely removable (so I could get the entire printer out for servicing and repairs) so I attached it with screws. I attached everything else with wood glue and 16 gauge finishing nails. I was able to make the whole thing out of a single 4x8 sheet of MDF that cost me about $30.
I learned from YoutTube that putting your printer on something heavy and rigid would significantly reduce noise, so I scrounged up some old 2-inch thick patio pavers from a backyard project. Luckily, they were a perfect fit, so I put one of those on top of a 1-inch thick rubber paver underneath my printer. This combination reduced noise even more than the enclosure itself!
Lights and Fans
For lighting, I decided to use some extra LED strips I had from another project. I mounted them inside and made sure to do a really good job with cable management to prevent any wires from getting tangled in the printer.
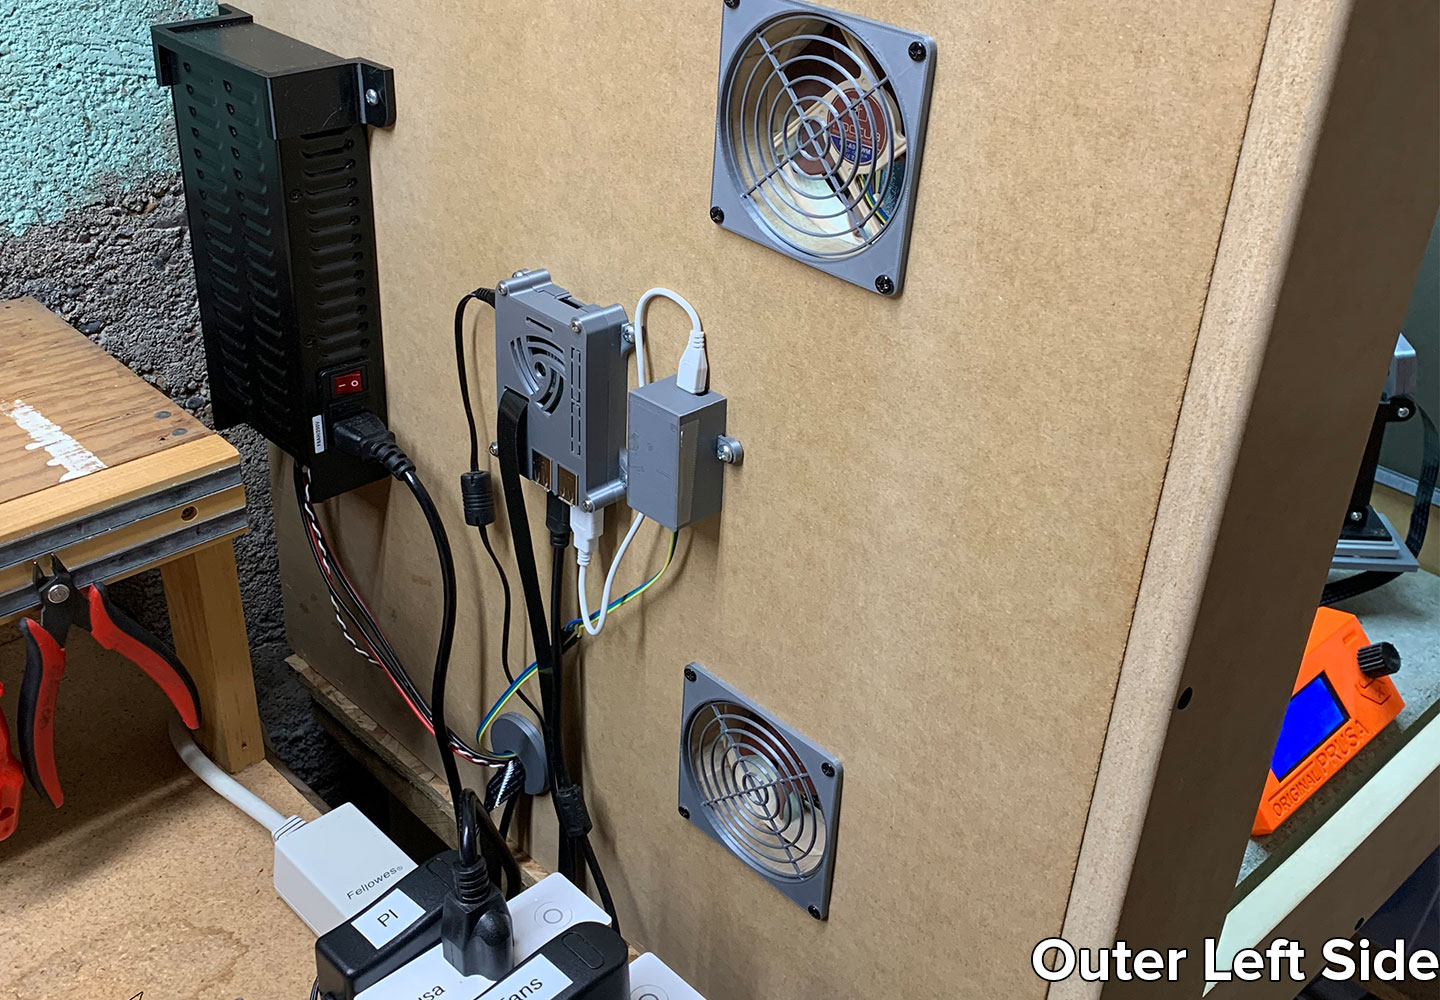
I also decided to install fans to regulate the temperature. I cut two 3 1/2 inch diameter holes in the MDF and mounted two Noctua 92mm fans inside (the bottom fan pulls cool air in and the top fan pushes hot air out). I printed fan covers and fan ducts with 90-degree deflectors to prevent air from being directly blown over in-progress prints. I then mounted a cheap fan controller in a 3D-printed enclosure to the wall of the enclosure so I could easily adjust the fan speed by turning the knob.
Remote Access
I wanted to be able to remotely manage and monitor my prints so I mounted a Raspberry Pi 3B+ to the side of the enclosure and set it up with Octoprint ( an amazing open-source project that delivers a full-featured web interface for your 3D printer). It allows me easily upload gcode files into the web interface and remotely start, pause, and monitor prints from any computer (or phone). It even supports remote viewing via a Raspberry Pi Camera that I have mounted to my printer.
On top of that, Octoprint has a huge community of plugins that add all sorts of different features. Octolapse is really cool plugin that let’s you create really slick time-lapses of your prints. I also use a plugin called SMS notifier so that I get a text message when my prints complete that includes a picture of the finished product. TopTemp is another favorite of mine as it gives you an easy way to monitor the ambient temperature as well as the temperature of the hotend, CPU, and bed.
In order to be able to remotely turn on/off the lights, fans, and printer itself, I used some Belkin Wemo smart outlets. Eventually, I’d like to integrate these with Octoprint, but for now, I can just use the app on my phone to turn on everything before starting a print. I also like having the peace of mind that I have an emergency shut-off switch that I can trigger remotely if there is an issue.
Other Accessories
I was pretty happy with the enclosure but I still continued to add to it over time. This picture shows some of the improvements I made.
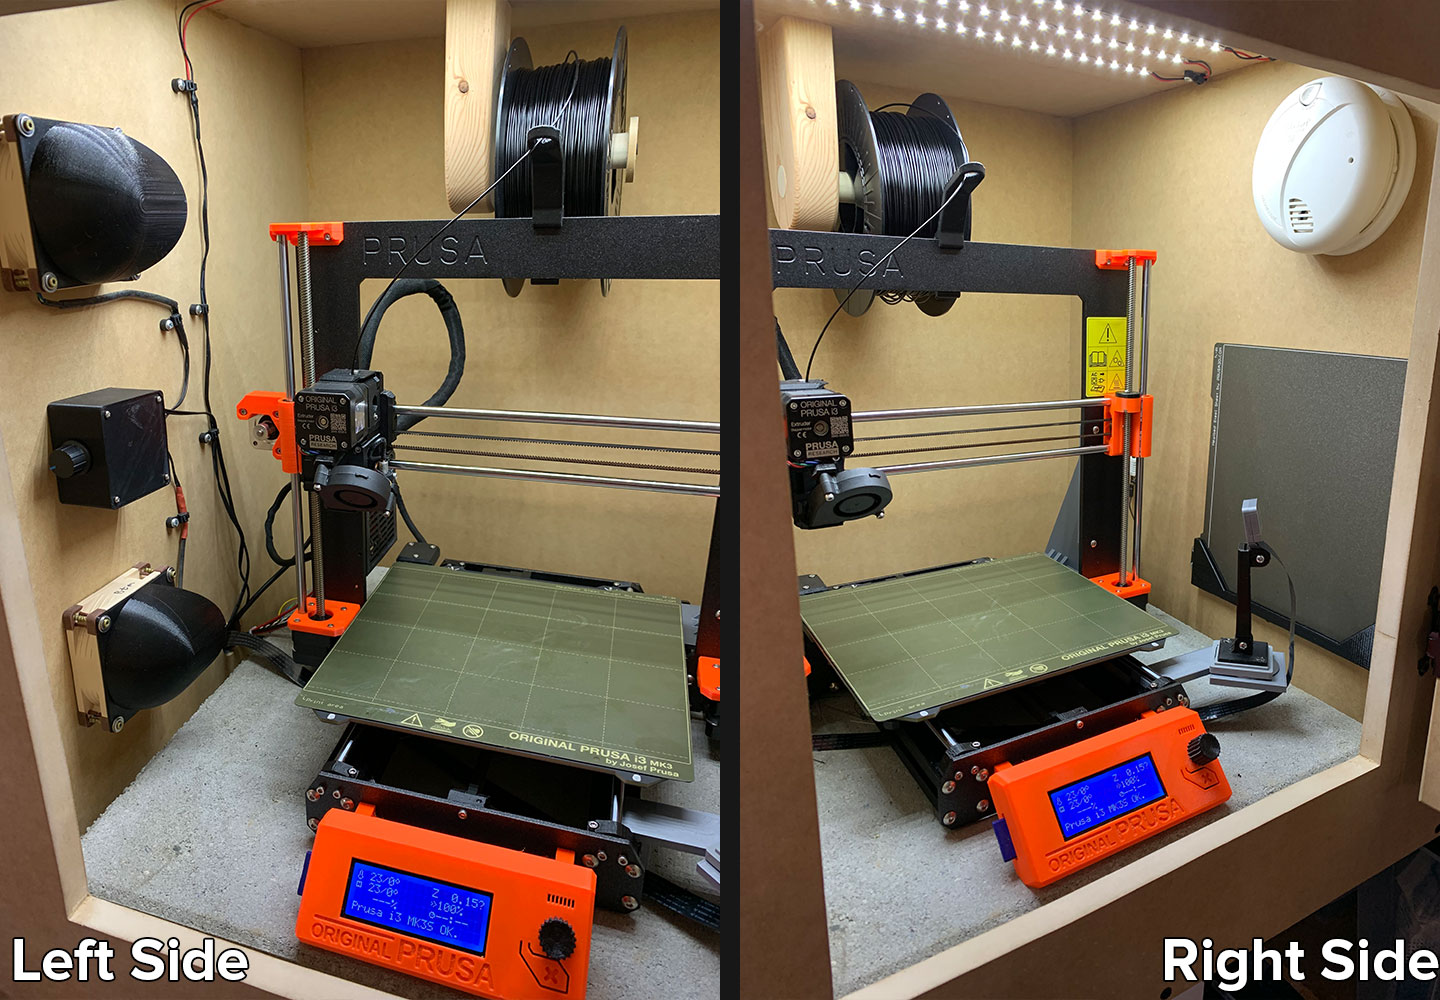
- I removed the power supply from the printer, mounted it outside of the enclosure, and replaced it with a printed support bracket to keep the printer frame rigid.
- I added a ceiling-mounted spool holder that is way more solid than the one that comes with the printer.
- I added an Arduino ESP8266 with a temperature sensor so I can remotely monitor and log the ambient temperature over time.
- I added a steel sheet holder for holding printer bed sheets.
- I added a smoke detector just in case.
Conclusion
Overall, I really love this setup. I use it often and I love being able to run my printer silently in a dust-free and temperature-controlled environment. I do plan on continuing to improve it though. I plan to add a hose from the enclosure out my basement window so I don’t have to worry about harmful fumes. I also might add some quick disconnects for my printer’s power cables to make them easier to remove for maintenance.
You can find my components and printed parts lists below if you are interested in making something similar yourself. Happy printing!
Purchased Components
- Noctua 92mm fans
- Fan controller
- Patio paver
- Rubber paver
- Cheap smoke alarm
- LED lighting
- Temp sensor
- Arduino ESP8266 Microcontroller
- Raspberry Pi
- Raspberry Pi Camera V2