Building a Wi-Fi Controlled Nerf Turret
Earlier this year, I decided to build a 3D-printed Nerf turret with streaming video that is fully controllable from a web browser. It’s something a 6th grader would have thought was a good use of time, but for some reason as a dad in my thirties, I spent the last several months hacking it together. I’ve created a printables project and github repo if you are interested in making one.
Starting the Build
I started this build focused on finding a way to fire darts using Python. I figured the best option was to repurpose an old Nerf blaster so I settled on using the Nerf Swarmfire. I liked that the Swarmfire had an electronic trigger and used a motorized direct plunger which is quieter than most flywheel blasters. Also, the lack of a flywheel meant it could shoot instantly and didn’t have to wait to get up to speed.
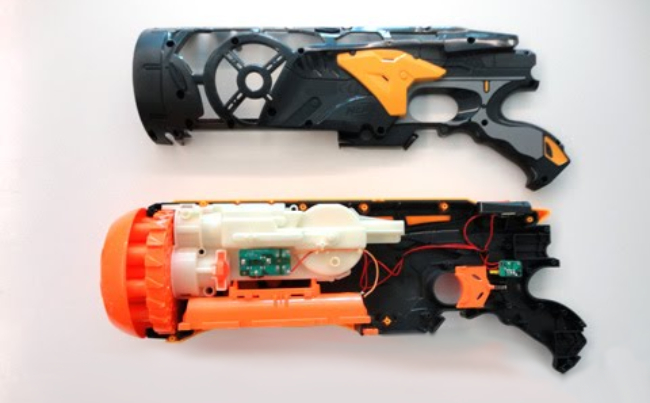
I pulled the internals out of the blaster’s plastic shell, removed the trigger button, and replaced the six C batteries with two 18650s. I then created a 3D printed mount to hold an SG90 servo and hot glued the trigger button to it. After wiring it up to the Raspberry Pi (with servo HAT), I was able to adjust the servo movement to consistently shoot darts with Python commands :)
The Turret Base
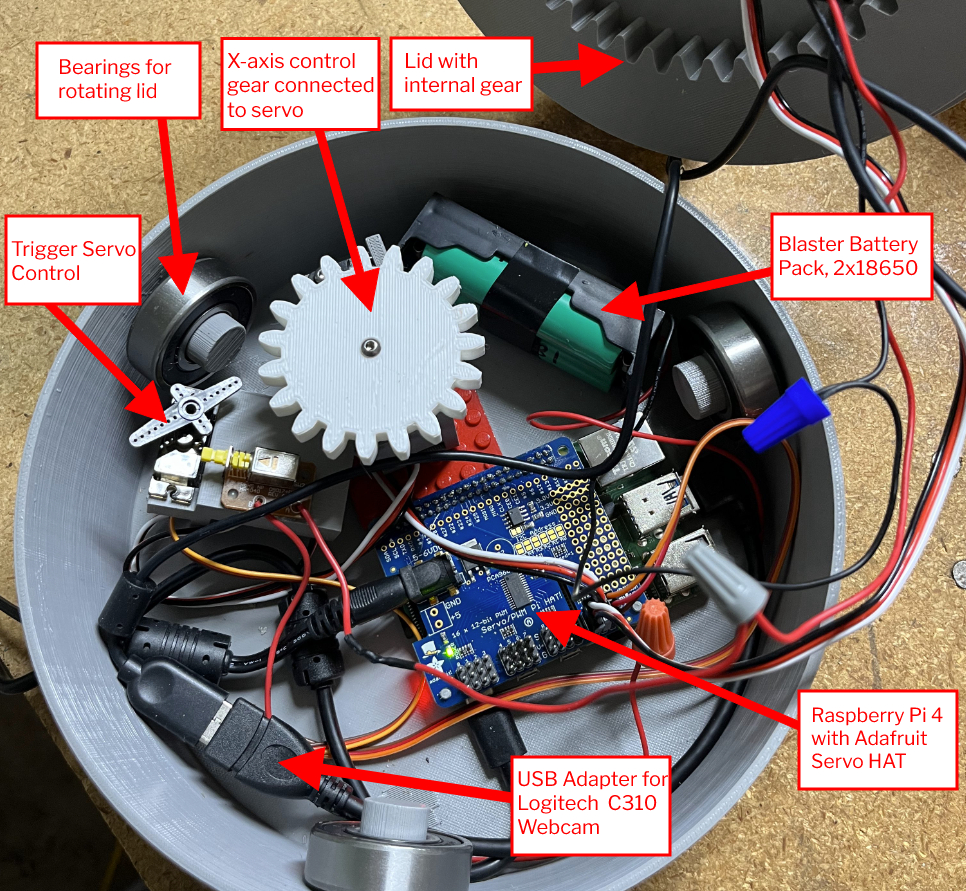
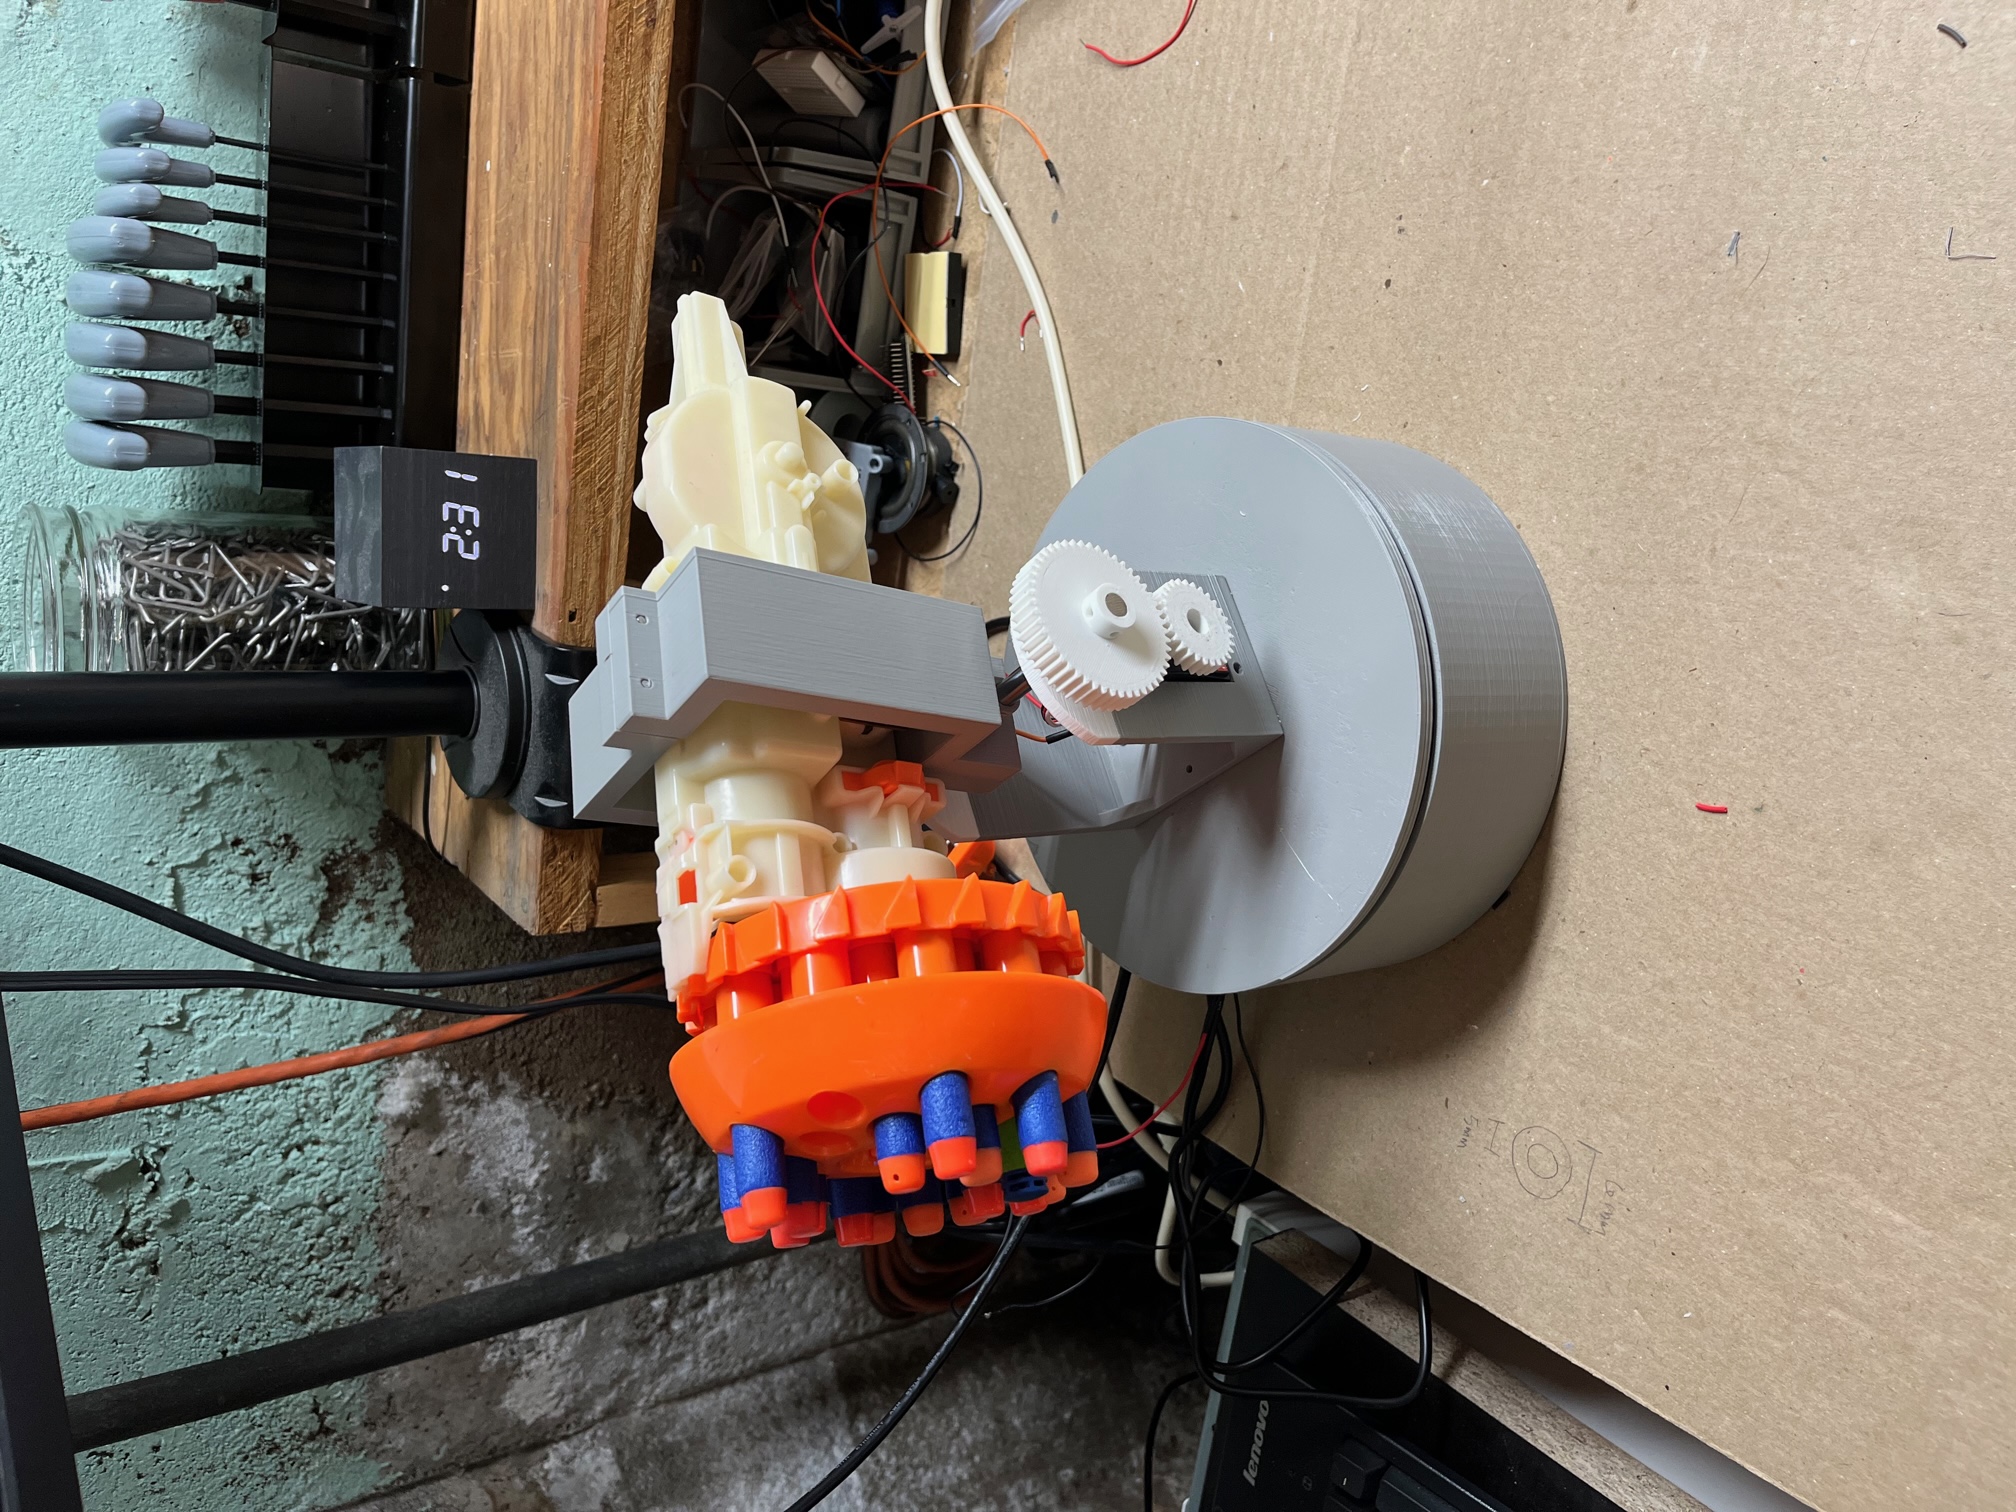
For the rotating base of the turret, I found an existing display table project that worked perfectly. I liked that it was big enough to house all the components and could easily open when I needed to make adjustments. The rotating base already handled the X-axis rotation with internal gears so I only had to make minor tweaks to allow a different placement of the X-axis servo. I ended up putting lego studs inside the rotating base and designed a lego friendly mount so I could adjust the placement of the X-axis servo inside the base.
Y-Axis Control
For the Y-axis control, I created a simple design that held an 8mm steel rod and had mounts for a servo (inspired by this project). I then did some measuring and designed a bracket that would hold the internal firing mechanism of the Swarmfire to the Y-axis mount, attached with M3 bolts on each side. With these pieces in place, I wrote a quick script to allow control of the turret with a keyboard. After a bit of tweaking to make the movement smooth, I finally had a working prototype!
The Web App
I liked my prototype but I wanted to be able to control the turret wirelessly from any device in my home. I also wanted a camera so I could see where I was aiming remotely. I experimented with several different options but ultimately decided on using a web app with WebSockets for real-time control of the turret with streaming video.
I modified this Flask project as a starting place and was quickly able to control the turret from touch events on my phone. I implemented keyboard event listeners so I could also support desktop browsers and added some CSS to give it a cool retro terminal look.
I then embedded a streaming video feed which turned out to be much trickier than expected. Despite my best efforts, I could not get a Flask app to support asynchronous WebSockets and streaming video simultaneously without lag. I finally gave up on that and used two separate apps running on different ports for the video feed and the WebSockets server separately. I put together some scripts to make it easy to start and stop both processes and I was pleased with the result. The code is available here.

The Enclosure
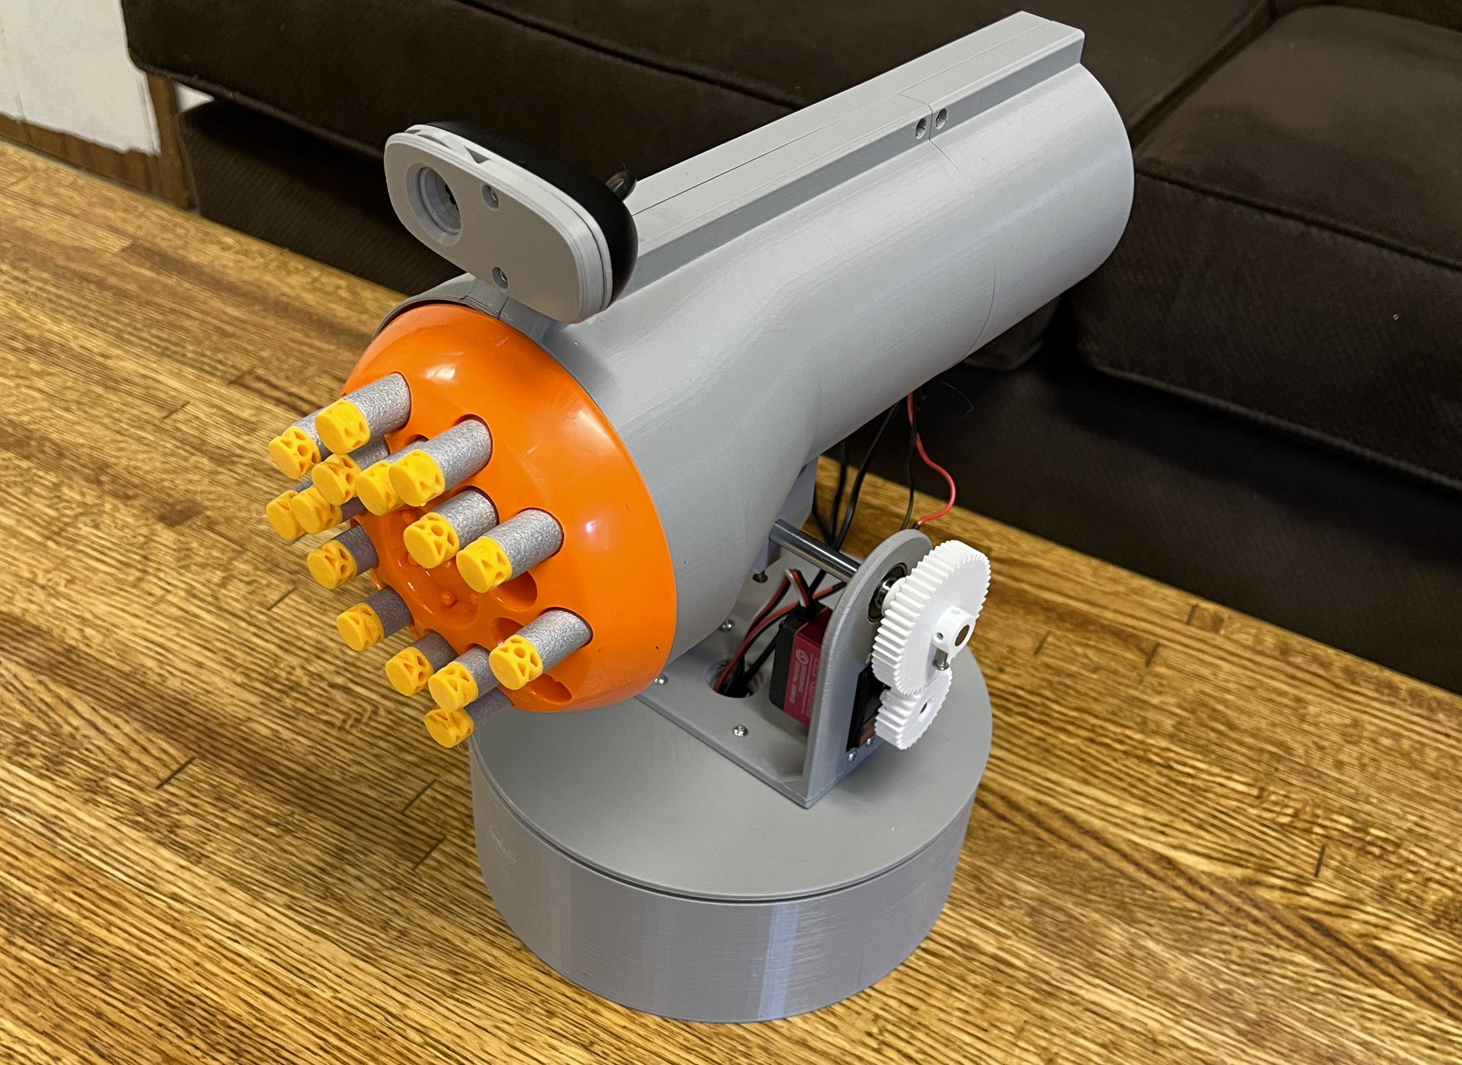
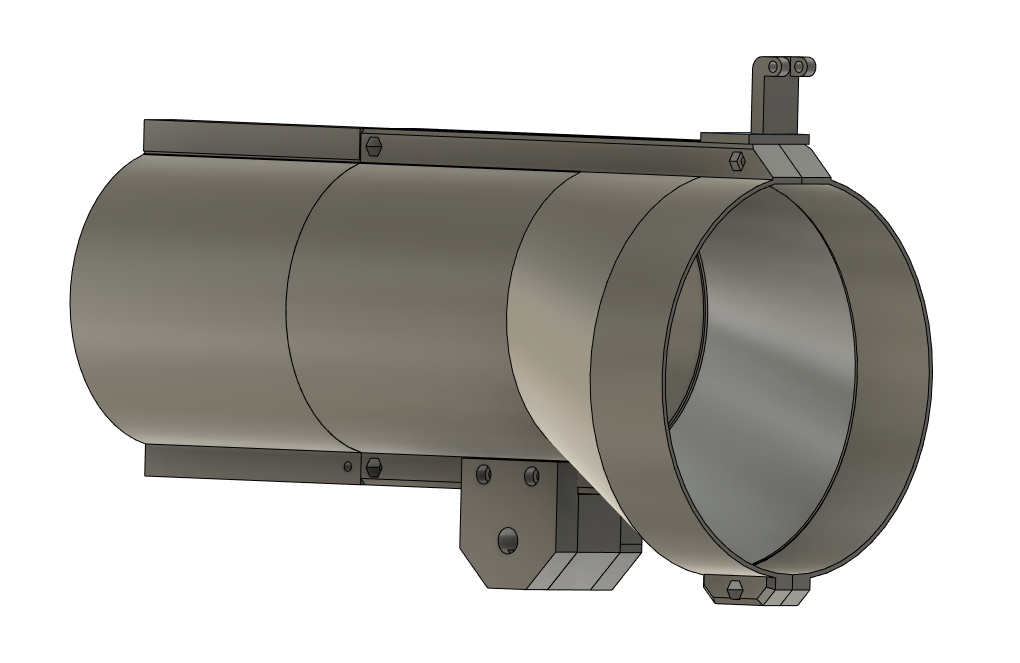
Now that I had a good control scheme, I wanted the turret to look more like a real product. I designed 3D printed enclosure and learned a lot about creating complex designs in Fusion 360 in doing so. I ended up with six parts in total for the enclosure: four pieces that made up the main shell for the Swarmfire, a dedicated piece that connects the shell to the Y-axis rod, and a dedicated mount for the camera. Everything was held together with M3 bolts with built-in slots for the hex nuts.
Conclusion
I love that I spent all this time on such a ridiculous project. The turret is really fun and seamless to use (see this video). My Fusion 360 skills improved dramatically in building this and I learned how to iterate on a design with lots of moving parts. I plan to continue to work on it and hopefully add things like “sentry mode” and face tracking in the future. Stay tuned!