The Office Bell Ringer
At my company, it’s a tradition to say “ring the bell” when we sign a new customer, release a new feature or receive other positive news, big or small. When we hear the large bell ring in the center of the office, we know that something good just happened. It’s been a great way to celebrate the wins we have together.
The problem is that our remote team members are completely left out of this experience. This (as well as my obsession with all things IoT) is what inspired me to make a Slack-based automated office bell ringer. My plan was to build a Raspberry Pi-based servo that would physically ring the bell via a Slack command that could be sent from any employee (remote or not).
Hardware Setup
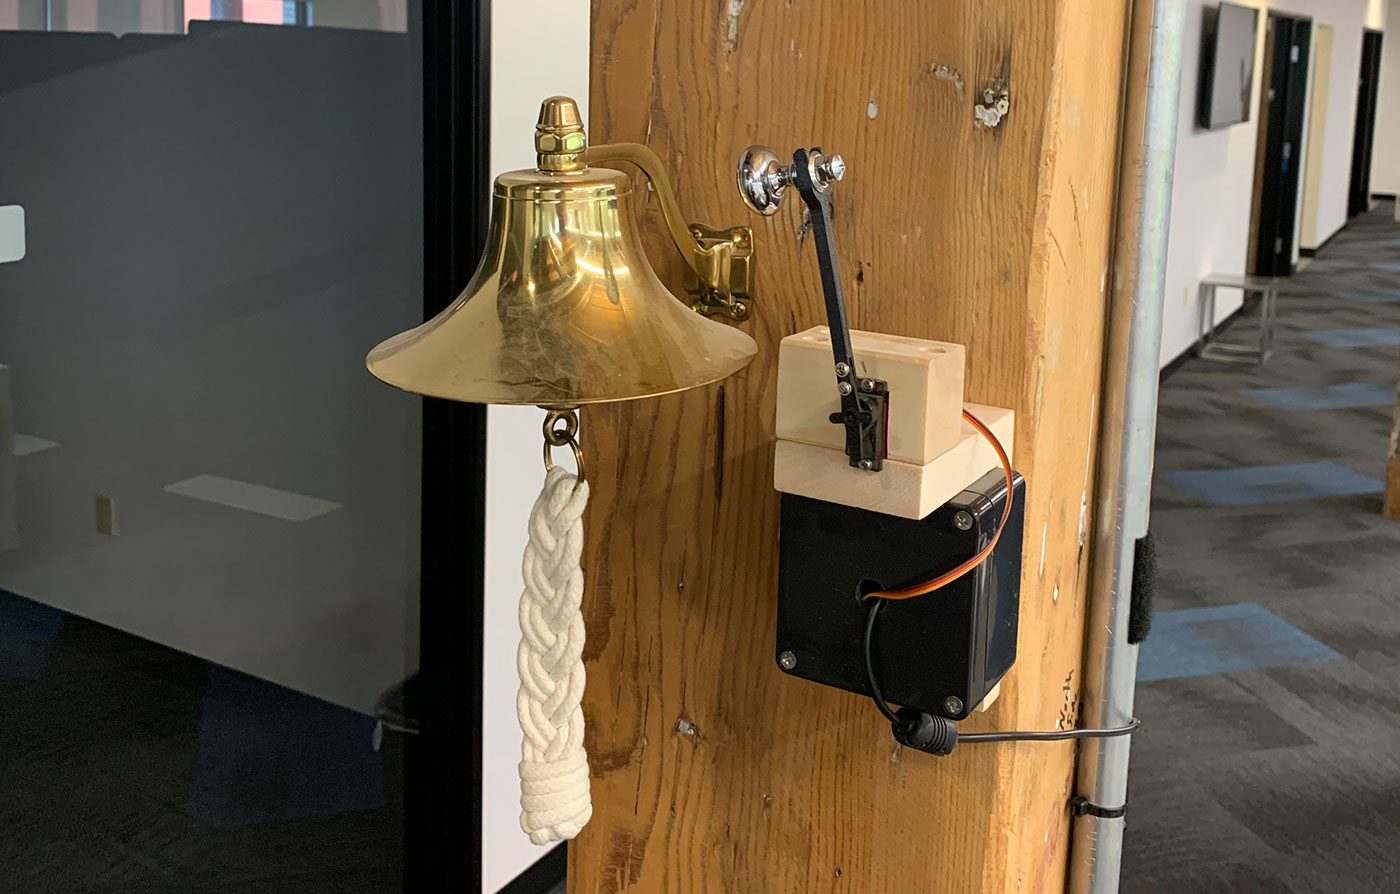
For the hardware, I used an old Raspberry Pi 3 B+ that I already had on hand and attached it to a servo to do the bell ringing. I picked up these servos on Amazon that ended up working quite well.
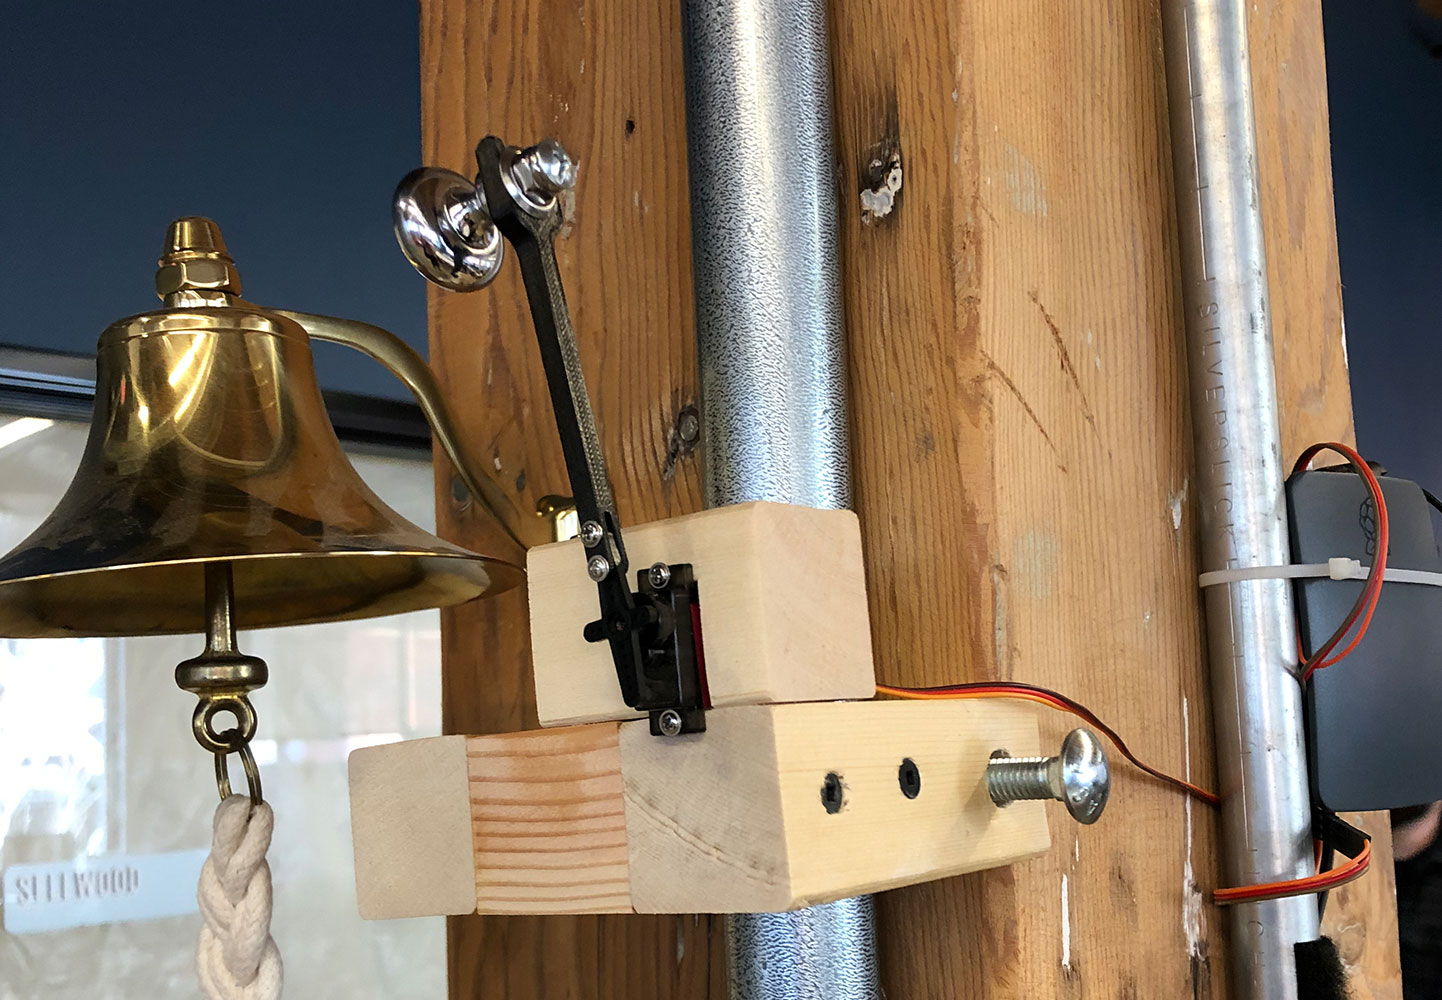
Next, I needed a hammer arm. I wanted it to be strong and light and also something that be securely mounted to the servo. It turns out someone already designed the perfect 3D part for this use case and my coworker was nice enough to 3D print it for me 😀.
I found that a drawer pull worked well as a hammerhead because it could easily be mounted to the arm and I already had some lying around. I was able to experiment with different materials and weights to determine which sound I liked the best.
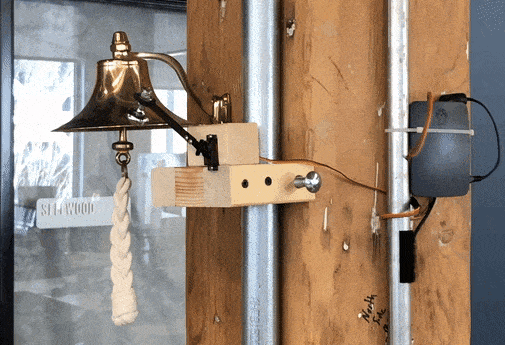
With the hammer figured out, I wrote a super simple python script to ring the bell using the Python GPIO module. It took some guessing and checking to get the timing figured out but I ended up with something like this.
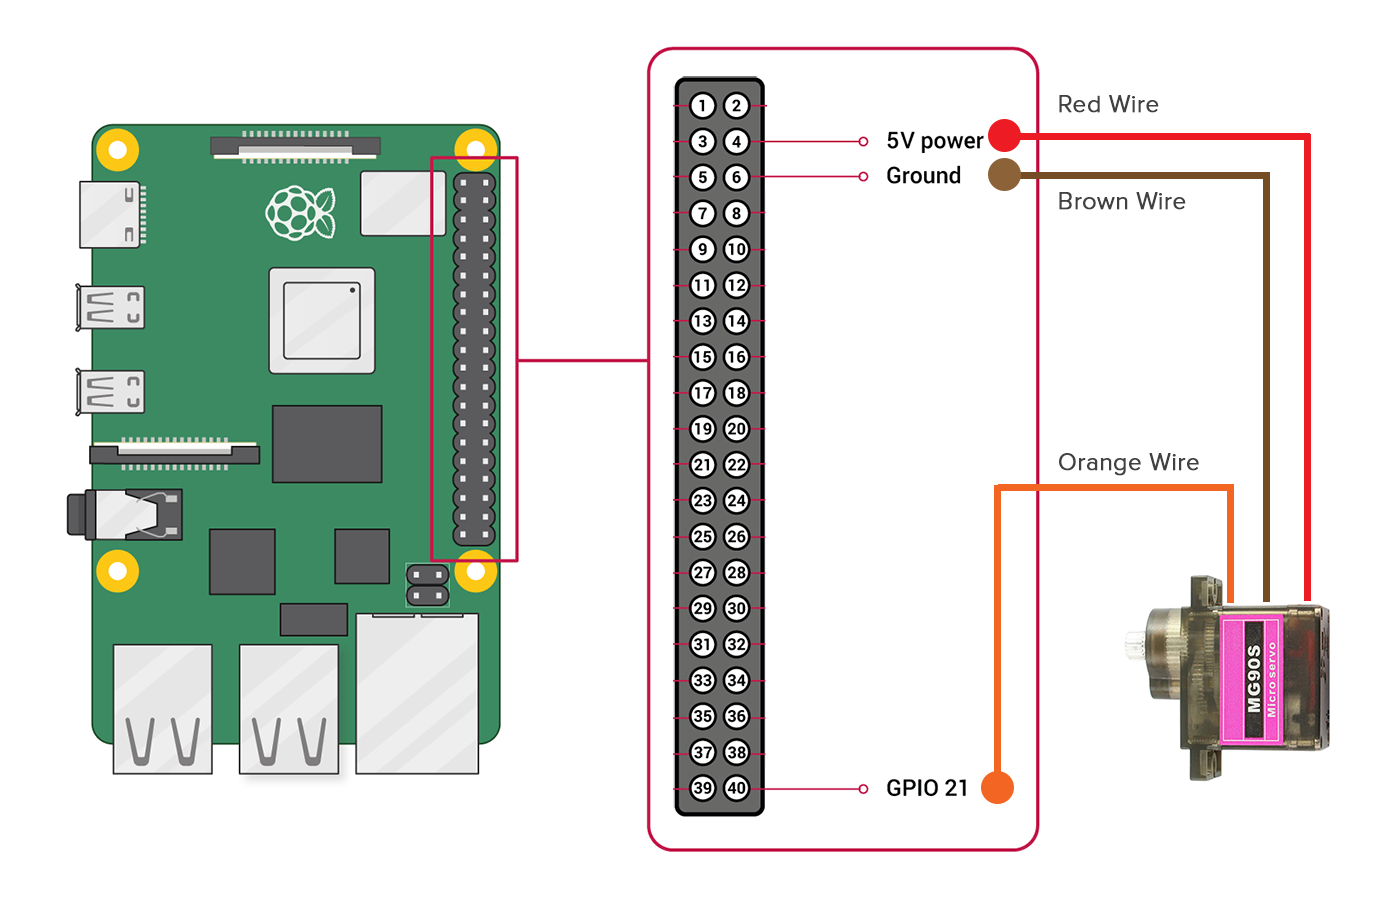
It’s also important to note that you need connect the servo wires to 5V Power (red servo wire), Ground (brown servo wire) and GPIO 21 (orange servo wire). You can use any of the GPIO pins but that’s the one I picked. You can see my wiring diagram below:
Slack Integration
Next, I needed to integrate it with Slack. I decided to use the awesome slackclient module (Python 3.6+ only) which makes use of the Slack Real Time Messaging (RTM) API. This is a WebSocket-based API that allows you to receive events from Slack in real-time and send messages as users.
With the Slack RTM API, you create an RTM client and register a callback function that the client executes every time a specific Slack event occurs. You also can make web client calls inside the function which lets you do things like respond to users, send emoji reactions, etc. This means I can do things like block people from ringing the bell too frequently by filtering out their username and sending a snarky response. I also configured it to always respond with an emoji reaction when someone successfully rings the bell, so remote employees get some actual feedback that it worked, like this (script here):

One potential downside to this approach is that it requires maintaining a single long-lived connection to Slack. This means it can be prone to failures, like if WiFi connectivity drops, or if the network is not conducive to long persistent connections. My hacky solution was to create a cronjob that runs a bash script every 15 minutes to check if the bell ringer is running. If it isn’t running, the bash script starts it. This has worked surprisingly well.
Mounting It Up
I decided that the looks of the bell ringer weren’t super important to me. I just wanted it to be securely mounted so that the movement of the servo wouldn’t cause it to slowly fall off the wall. Conveniently there is an electrical conduit running right next to the bell itself so I could easily mount the Pi and Servo to that. I cut down some 2x2s and glued them up into a clamp-style mount for the servo. I used a 5/16-inch lag bolt that I threaded through a tee nut to attach it to the conduit. I then zip-tied everything into place.
Conclusion
I’m happy to say that the office bell ringer has been a success. It continues to work well and I’m surprised how often it gets used. But there’s always room for improvement, below were some things I would do differently next time:
-
I should be using a HAT (“Hardware Attached on Top”) for the Pi (like this) instead of running the servo directly off the Pi’s included GPIO board. With a HAT, I could get much better control and timing of the servos and have better electrical protection to avoid frying the Pi.
-
Rather than using a cronjob to check and restart the python script, I should probably configure it as a Linux service (daemon). This seems like the smarter and more proper way to do it.
-
I’d like to look into doing a similar project with the ESP8266 integrated chip or the Pi Zero W instead of the full-sized Raspberry Pi 3. I used the Pi 3 out of convenience, but it has much more overhead than these smaller more IoT focused boards with WiFi built-in.
Update (July 25, 2020)
Our office went through a remodel recently and the conduit used for mounting the bell ringer was removed, so I needed a new mounting method. I figured I’d swap out my Pi for a Pi Zero W while I was at it. It’s just as capable for this task as the Pi 3 B+. I thought about an ESP8266 microcontroller, but I couldn’t find an easy way to use the Slack RTM API with as it doesn’t run a full Linux OS.
I also used a cheap electonics enclosure to hide all the wires. I think it looks a lot better now and it still functions just as well!